In this article, you will learn how to configure the Wi-Fi network connection on your Mvix players.
 Note: Although Mvix devices are Wi-Fi compatible, we do recommend using an direct ethernet connection as it is faster and more reliable.
After your device loads to the desktop, you will be able to set up a wireless network connection (if your network supports it). The Mvix device has a built-in Wi-Fi adapter, which allows you to wirelessly connect to a network. Here’s how to set up your Wi-Fi connection.
What You’ll Need:
- An Mvix digital signage player
- Network with wireless access (WiFi connection)
- USB mouse
- USB keyboard
- Display Screen/Monitor
Note: Mvix players support up to wireless N and we recommend a 2.4 GHz connection. This is for a more stable connection.
Connecting to your Network
- Connect your Mouse & Keyboard to the Mvix device.
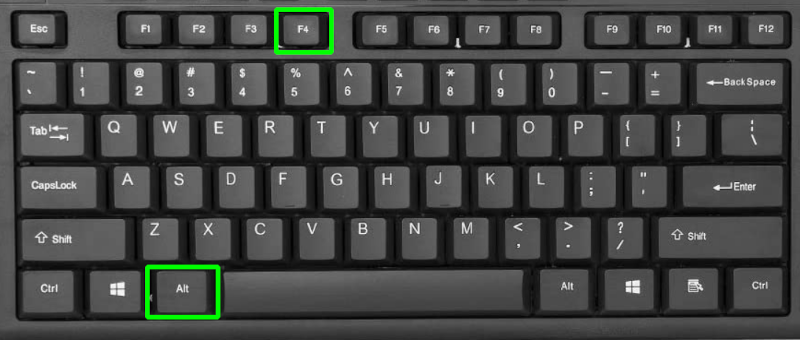
- Press and Hold ALT + F4 (this will close the running content).

- Press and Hold CTRL + ALT + T (this will open a terminal window).

- Type dsv3-stop and press ENTER (this will stop the content app from relaunching).
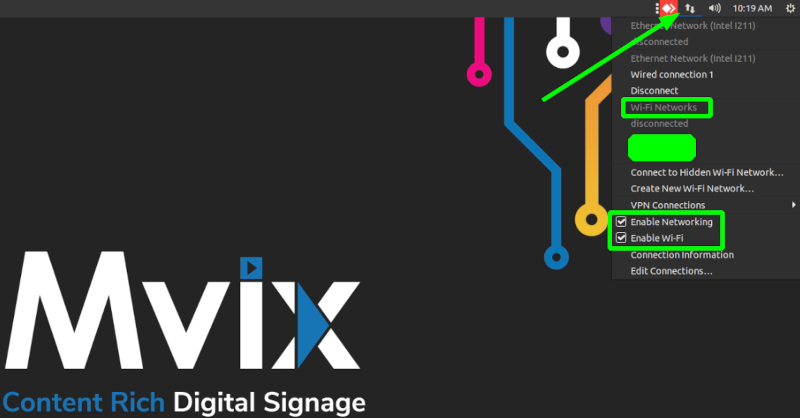
- Hover over the top right corner of your screen. Then click the up and down icon to see your Wi-Fi network.
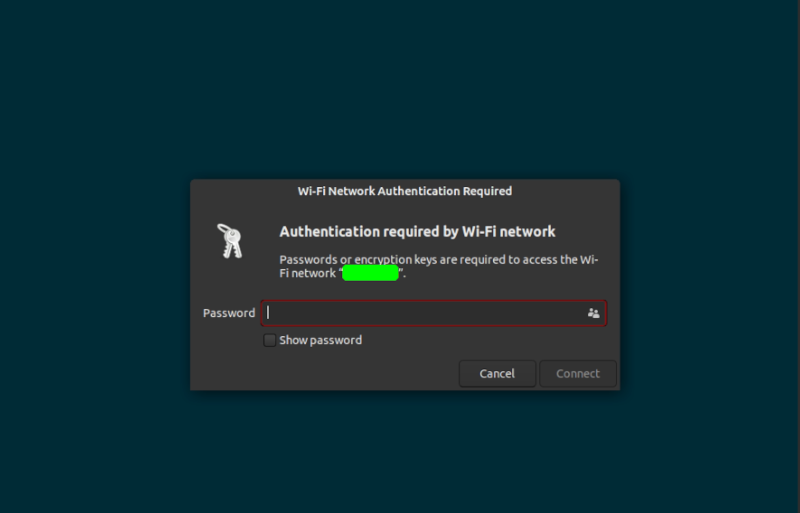
- Click on the name of your network and enter the password to connect your device.
- If you have not yet changed your password or simply do not know it, the manufacturer has a default password on the wireless router that you can enter. The password can usually be found on the bottom or on the back of the router.
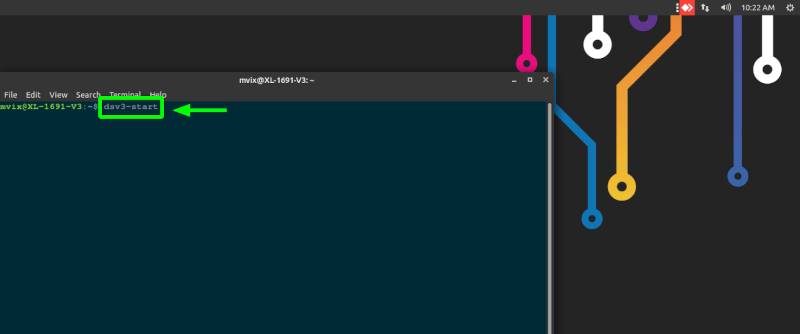
- Once you have successfully selected your network and entered your password, open the terminal by pressing and holding CTRL + ALT + T. Then type: dsv3-start (and press ENTER).
After completing these steps, the application should load and within 10-25 minutes begin displaying content.
The time it takes for the firmware to launch on the Mvix hardware is highly dependent on the current state of the network; where the device is installed and connected.
Third Party Players That May Use Wi-Fi Connection
Our Mvix players are not the only players that can utilize a Wi-Fi connection. Here are the other players available by Mvix that can use this connection:
- Andriod Players (Acer, Asus, HP, Chromecast)
- BrightSign Media Players (XT Line, XED Line, HD Line)
- Mini PC (Intel NUC, Lenovo Thinkcentre, HP Mini PC)
- Raspberry Pi Players
- SimplyNUC Media Players
Let Us Do It For You!
Fresh and relevant content is the cornerstone of a successful digital signage campaign. Don’t have time to manage your Digital Signage System or do you want your screens to look professionally designed? Let us do it for you. We will manage your digital signage screens for a fraction of the cost and minimize downtimes. Learn more about our Managed Service Plans.
Problems, Questions, and Corrections: If you have any further questions, problems, or corrections you would like to see made, please open a support ticket.
