In this article, you will learn how to add media to the media library in Mvix’s content management software, Mvix CMS.
The first thing that you will want to do once you have obtained your content is to upload it to your Mvix CMS media library. Your media library is accessible anywhere you’re logged into your account and houses all of your content. Before a schedule of any sort can be programmed, you must first add content to your library. This article explains how to upload content to your media library with a few easy-to-do steps.
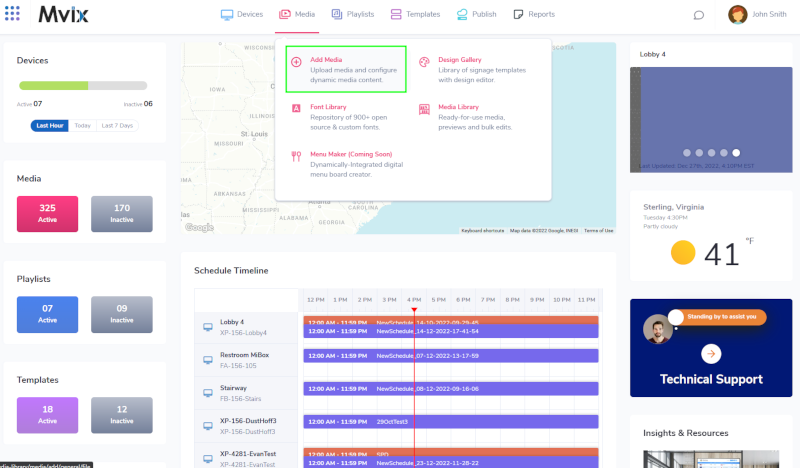
Media in Mvix CMS
Mvix CMS allows you to upload numerous external media into the content management software to customize your digital signage content. Files can be uploaded from your computer or Dropbox, Facebook, and Google Drive. Here are some of the following media files that can be uploaded into the Media Library:
- Images (mp4, .ogg, .webm, .flv, .mov, .mpeg, and more)
- Videos (.mp4, .ogg, .webm, .flv, .mov, .mpeg, and more)
- Audio
- PDFs
- Microsoft Office Files
- Email Content and more!
What You’ll Need:
If you meet the requirements listed above, simply follow the steps below to upload your media files successfully to your Mvix CMS media library.
Video Tutorial
Adding Media
- Log into the CMS and look for the “Media” tab near the top menu bar. Hover your mouse over the tab and click “Add Media” from the drop-down menu.
- The Files app is the default media app under the General Tab
- Click “File Upload” and browse to the desired media file on your computer, then choose “My Device”. This will open a new window and allow you to view your files on your PC
- We also offer several other media sources including Dropbox, Facebook, Google Drive, etc.
- You can also drag and drop files by clicking and dragging your media onto the square box that reads “DROP FILES TO UPLOAD”.
- The maximum number of files per upload is 10 files, while the maximum size limit is 1GB.
- You can upload a variety of different formats using this widget including:
- Supported formats: .bmp, .gif, .jpeg, .jpg, .mp3, .mp4(H.264), .ogg, .pdf, .png, .svg, .wav, .webm
- Note: Legacy formats are no longer supported by XhibitSignage: .avi, .flv, .mov, .mpeg, .mpg, .swf, .wma, .wmv
- Supported formats: .bmp, .gif, .jpeg, .jpg, .mp3, .mp4(H.264), .ogg, .pdf, .png, .svg, .wav, .webm

 Important Note: The maximum number of files per upload is 10 files, while the maximum size limit is 1GB.
- Another option is to upload the “File From Web Server”
- Simply input the URL file location of the file you would like to add to the CMS
- “File From Local Server” is similar to the above option but requires a local webserver
- Please note the example as you will need the exact IP address & file location for the CMS to properly upload the file
- Lastly is “Secure FTP”
- The option is only for Mvix Signature Care clients and lets clients securely upload their files to the CMS.
- Now that you have uploaded the media file(s) you can additionally title (apply a name you’ll recognize), group, and tag them. Please see a detailed knowledgebase article that explains Tagging and Grouping here.
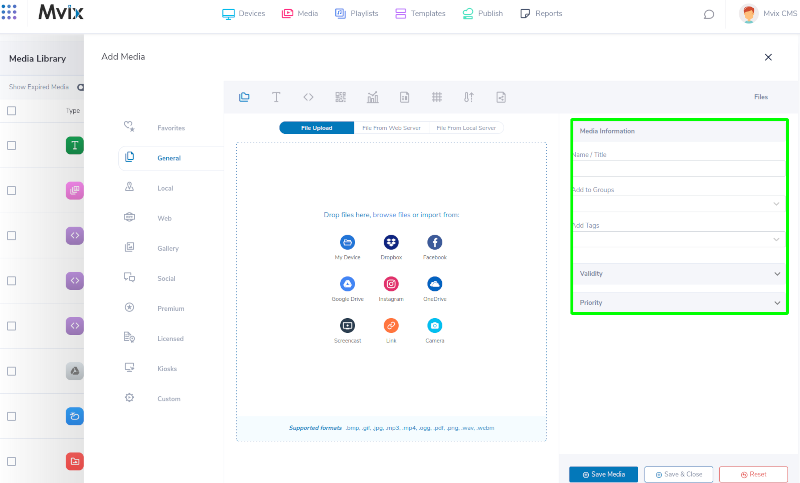
- Once you’ve filled in the required fields, the last step is to click the “SAVE Media” button. This will upload the file(s) and place it into your Media Library.
Digital Signage Content Guide
Merely having digital signage displays available to your audiences is not enough. People crave information that is highly relevant and easily digestible so that they can spend more time doing what they want, rather than trying to decipher the meaning of a message on a sign. That’s why it is essential to build out a content and design guide for your digital displays. Here’s a helpful guide discussing content design tips to maximize your signage attraction.
Let Us Do It For You!
Fresh and relevant content is the cornerstone of a successful digital signage campaign. Don’t have time to manage your Digital Signage System or do you want your screens to look professionally designed? Let us do it for you. We will manage your digital signage screens for a fraction of the cost and minimize downtimes. Learn more about our Managed Service Plans.
Problems, Questions, Corrections: If you have any further questions, problems, or corrections you would like to see made, please open a support ticket.
