The event listings content app for Mvix CMS allows you to display all upcoming events from a supported calendar in an easy-to-understand format. It is great for keeping track of deadlines, corporate events, birthdays, and other calendar elements.
Managing and keeping upcoming events up-to-date can sometimes be a bit of a headache. However, digital signage can be really helpful in making sure that everyone knows about these events. With the event listings content feature, you can easily take care of and edit your upcoming events. Plus, you have the option to choose from different themes to make them look appealing.
Additionally, you can add a countdown timer to your events to help create anticipation for the specific event. Furthermore, this feature integrates with many calendar applications, such as Google and MS Outlook, so your corporate office, government institution, or healthcare center doesn’t miss an important date.
What You’ll Need:
- A compatible digital signage player e.g. Mvix, BrightSign, etc.
- Mvix CMS Software with a supported feature package
- Internet Connectivity
- Access to the Events Content feature
If you meet the requirements listed above, simply follow the steps below.
Video Tutorial
Using the Events Listing
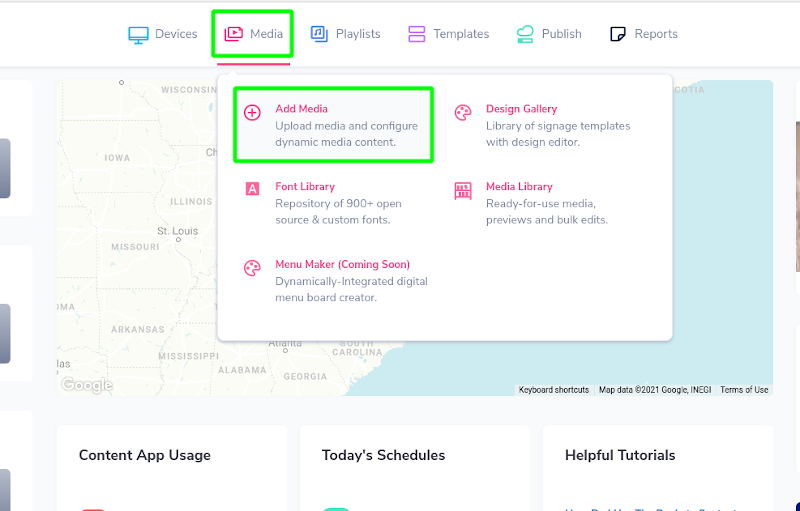
- Hover over the “MEDIA” tab, and click “ADD MEDIA”.
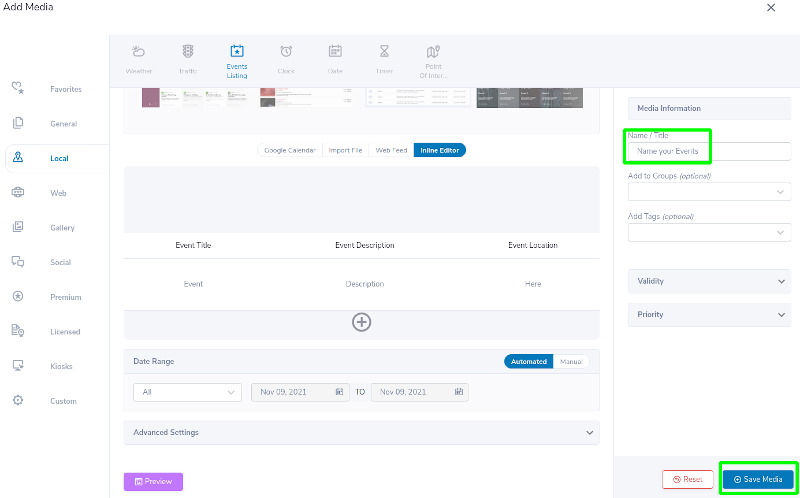
- Click on the “LOCAL” category
- Click the “EVENTS LISTING” app.
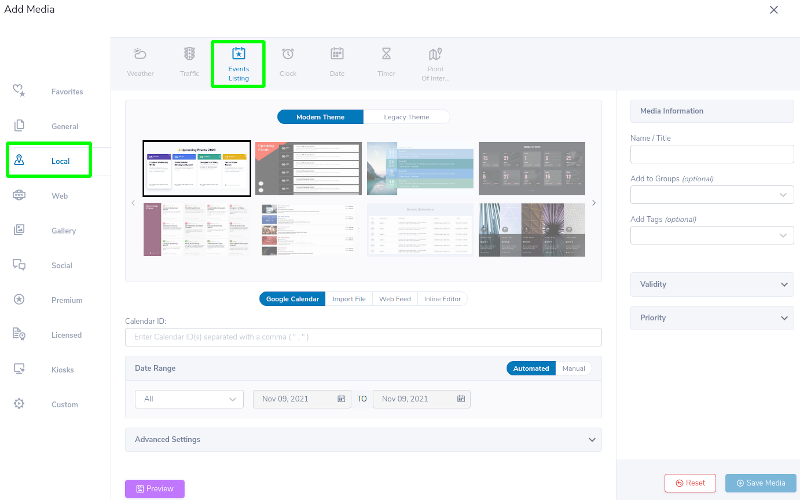
- Choose the theme your events will be displayed in.
- Choose how to get the data for your events. There are several options to do this:
- Google Docs
- Import Files
- Web Feeds
- Inline Editor
Google Docs

- Copy and paste the URL of your desired Google Calendar into the field.
- NOTE: If you are importing multiple calendar files, separate them with a comma.
- Click on the “PREVIEW” button to see if the file is pulling data correctly.
Import Files
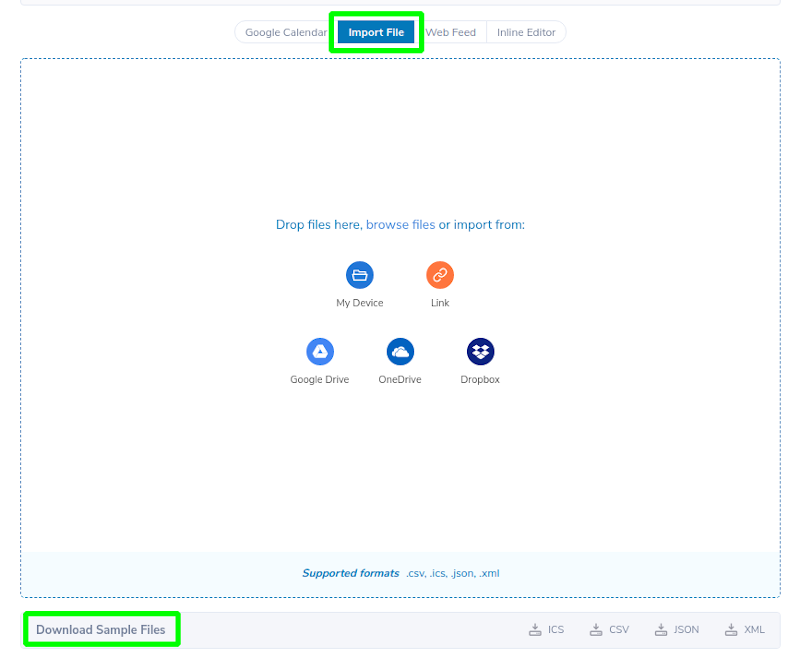
- Drop files directly or click on the file source button to begin navigating your file system to find the correct file to import. Select the files you want to use.
- You can download sample files to demonstrate the orientation the data needs to be in to be recognized.
- Click on the “PREVIEW” button to see if the file pulls the data correctly.
Web Feed
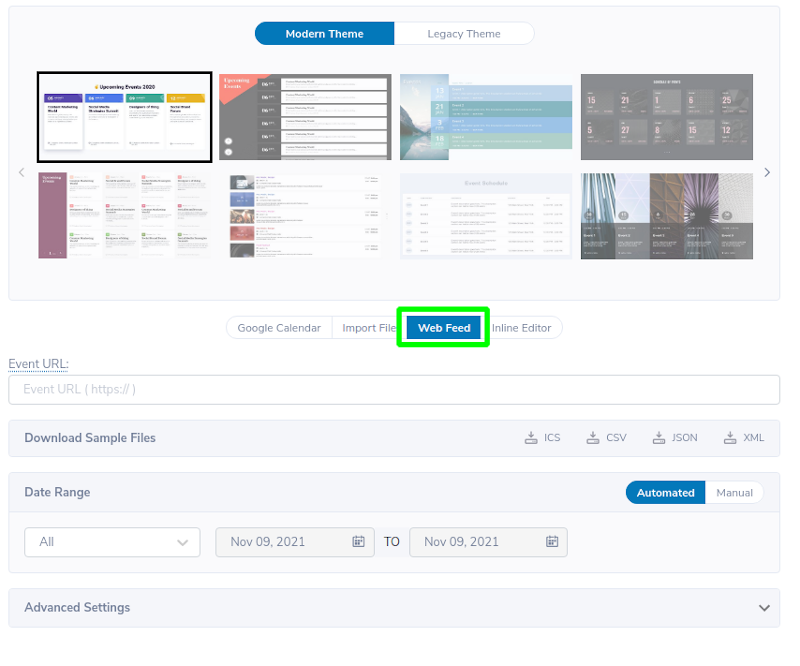
- Copy and paste the URL for your desired Web Feed. Please note the URL will need to end in a supported file type.
- Click on the “PREVIEW” button to see if the data is being pulled correctly.
Inline Editor
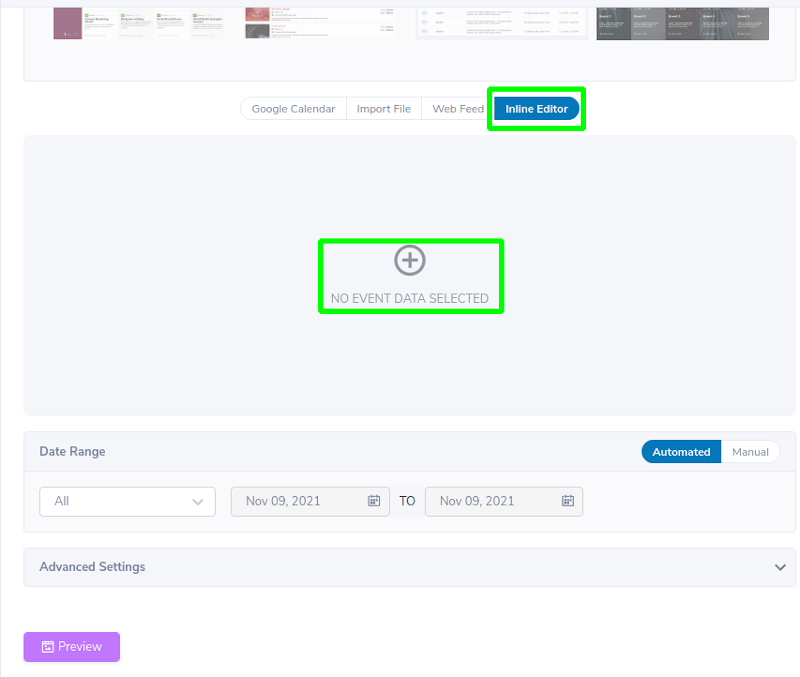
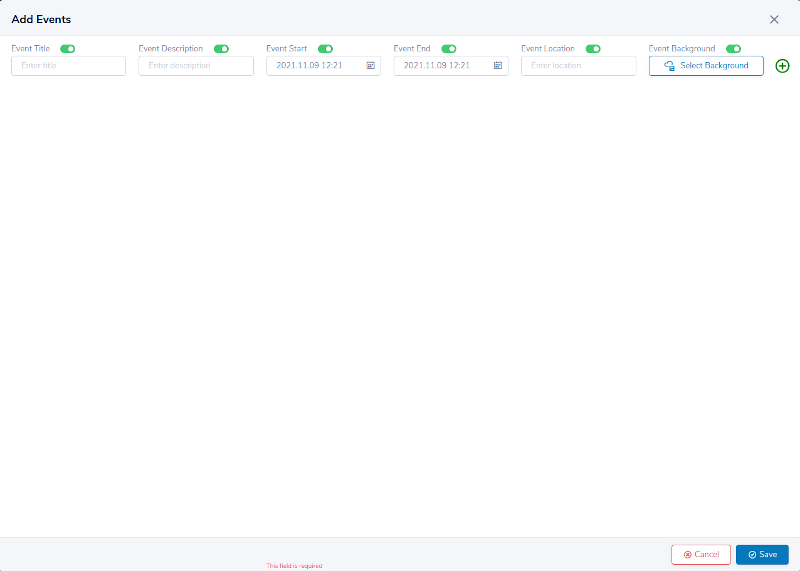
- Click on “Inline Editor”, then click on the Plus Icon in the center of the Data Zone.
- A new window will appear with text zones. Enter a title, a description of the event, the start and end time of the event, and the location of the event.
- Click “SAVE”.
Managing the Theme and Data

- Select the date range you would like the app to pull from.
- Use the automatic date to pull all data in the given calendar that is within the specified range in the dropdown.
- Use manual to manage the coverage of items pulled in a more minute manner, allowing for management of both date range and time span down to seconds.
- Use the Advanced Settings Menu to assign Text alterations, make changes to the animation and duration assigned, and adjust how frequently the system checks for updates to the Events source.
Once you have applied your Data, please Preview the Media. If the Preview looks correct, Name and Save your Media for use in your Library.
Here are Some Features of Using Event Listings in Mvix CMS
Our Event listings feature is not only useful internally, but also externally. Here are some ways of using the Event Listings feature:
- Set up your events once, and when the source is updated, the events on your screens will be updated automatically.
- Integration with calendaring apps like Google calendar, Outlook calendar, EMS, and Collegenet Series 25 makes it easy to manage how your events are displayed.
- Add ready-made themes that can be customized to add your logo, change the colors and fonts and even change the background image.
Let Us Do It For You!
Fresh and relevant content is the cornerstone of a successful digital signage campaign. Don’t have time to manage your Digital Signage System or do you want your screens to look professionally designed? Let us do it for you. We will manage your digital signage screens for a fraction of the cost and minimize downtimes. Learn more about our Managed Service Plans.
 Problems, Questions, and Corrections: If you have any further questions, problems, or corrections you would like to see made, please open a support ticket.
