The Twitch feature allows you to stream videos from the Twitch platform. Twitch is a video streaming service where millions of people come together live every day to chat, interact, and make their own entertainment together. It is primarily the world’s leading video platform and community for gamers. It also provides a fun and social way to watch people play games. This is great if you want to stream video games to your audience.
Through this feature, you can display live Twitch channels on your digital signage. You are able to either display Twitch channels that are in our CMS or you can display custom Twitch channels by entering an URL.
Markets That can Display Twitch on Their Digital Signage
There are numerous markets that can display Twitch on their digital signage to engage their audience and create an experience that optimizes traffic. Hare are some markets that should consider using this feature:
- Retail Stores
- Hotels
- Healthcare Facilities
- Sports Facilities
- Entertainment Facilities
What You’ll Need:
- A compatible digital signage player e.g. Mvix, BrightSign, etc.
- Mvix CMS Software with a supported feature package
- Internet Connectivity
- Access to Twitch
If you meet the requirements listed above, simply follow the steps below.
Using Twitch in Mvix CMS
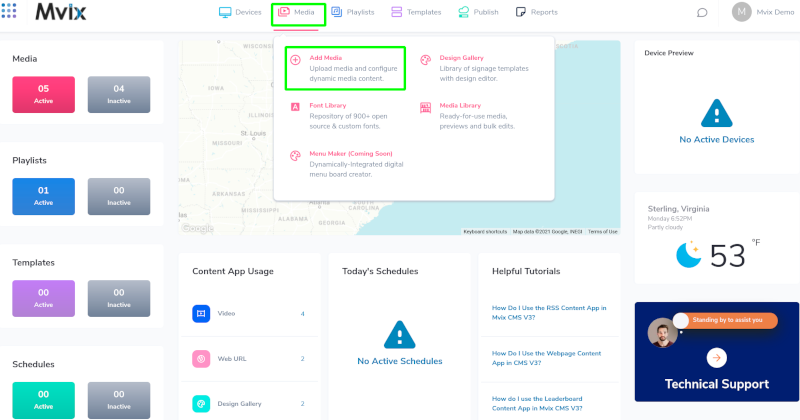
- Hover over the “MEDIA” tab, and click “ADD MEDIA”.

- Click on the “Web” category.
- Click the “Twitch” Content App.

- Select the channel you want to display.

- Any audio coming can be enabled or disabled by clicking the “Audio” toggle switch.
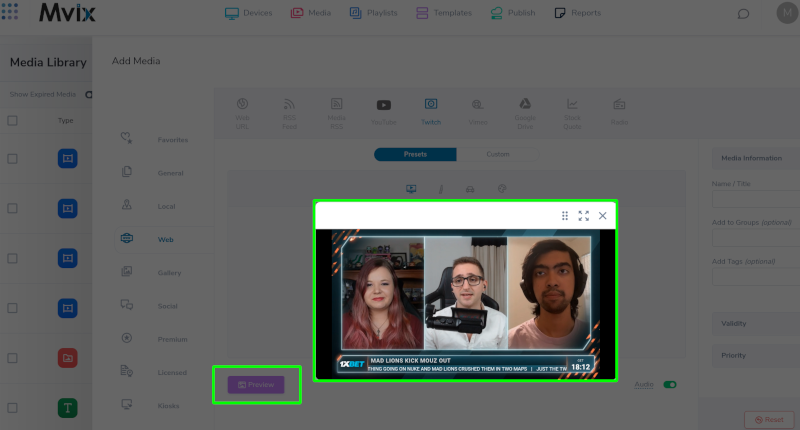
- Preview the content to confirm the settings.
- Name your custom source.
- Under “Media Information”, add a name or title and click “Save Media”.
Custom Configuration
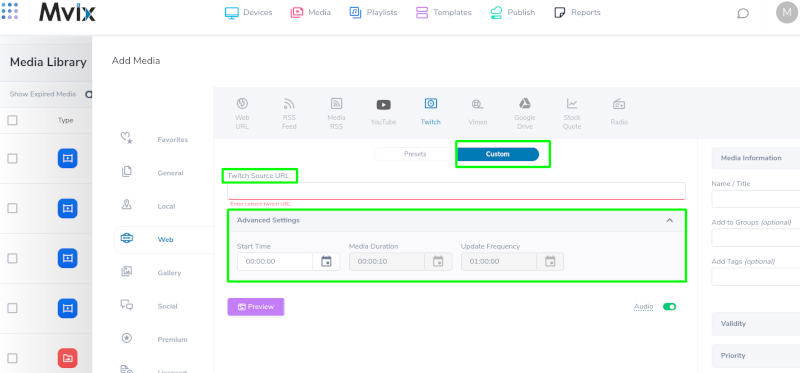
- Click on the “Custom” category tab.
- Enter the Twitch URL into the “Twitch Source URL” field.
- Use Advanced Settings to adjust settings such as start time, media duration, and update frequency.
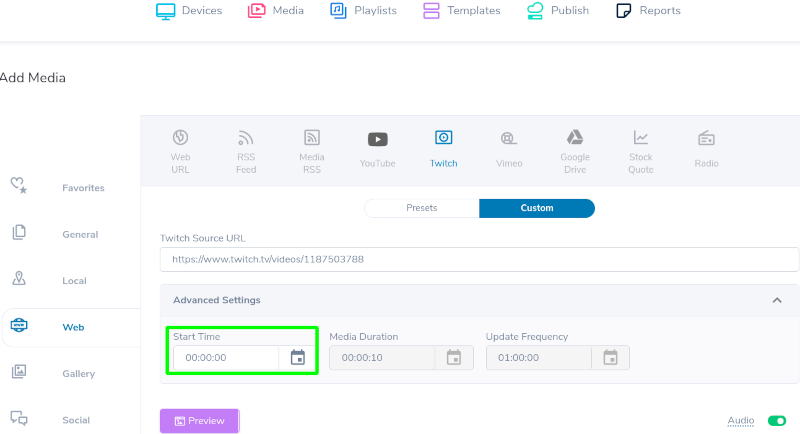
- The start time helps you skip to a specific time in the video, either by using the clock icon or by entering the time manually.
- Preview the content to confirm the settings.
- Name your custom source.
- Under “Media Information”, add a name or title and click “Save Media”.
The Twitch feature makes use of third-party content. Mvix does not own, change, or guarantee the availability of any third-party content.
Top Twitch Streamers
Here are the top 7 Twitch streamers you should consider playing:
- Riot Games
- XQC
- Auron play
- Squeezie
- Kaicenat
- ESL_CSGO
- Paulinholokobr
Digital Signage Forever
Designed for enterprise-digital signage deployments, our Signage Care plan offers a lifetime warranty, free digital signage players every 3 years, accelerated issue resolution, and premium content. Intended to enable high system uptime, operational efficiency, and continuous business innovation, the plan ensures proactive upkeep of the signage network. Learn more about Mvix Signature Care. Problems, Questions, Corrections: If you have any further questions, problems, or corrections you would like to see made, please open a support ticket.
